Showing posts with label Kids. Show all posts

Friday, December 11, 2015

Toddler Christmas Tree

Christmas is coming and the crafts are happening.  If you have little ones running around your house, here is a project for you!


I've seen several felt Christmas trees on pinterest so this isn't really a new project, but I wanted to show you how I did mine to help inspire you!

I had a large piece of green felt that I cut into a Christmas tree shape (fold in half and cut a tree shape).  I then stuck the tree onto the wall using Command mounting strips.  I was pretty concerned that the kids would rip the tree right off the wall, but after about two weeks we are still good.  But if you have the type of children that will immediately rip things off the wall, you may need to experiment with something else.


The ornaments came from Michaels.  I found a kit for making a garland that was basically a set of felt Christmas shapes.  These worked perfectly.  Obviously you could cut your own, but this was easier for me.

Finally, I added a garland that I found in the Target dollar spot.  I used more Command hooks and attached one on either side of the tree.  The pom pom garland can then be hooked onto it.  My one-year-old doesn't get this at all but the three-year-old does.  So you may or may not want to use this with your kids.


I've been storing the ornaments in some Christmas gift boxes at the base of the tree.  They look pretty and also add some fun for the little boy who loves opening and closing boxes.


Wednesday, November 11, 2015

The Evolution of an Idea: Allie and the Dragon

Lately, my daughter has been asking us to tell her stories.  After several stories about princess Allie, I introduced the character of the dragon.  Now she always asks for dragon stories.  I've been having so much fun telling the stories, that I really wanted to illustrate some for her.  However my human drawing skills have never been great; animals are my thing.  But I decided that I should try because the worst that can happen is I draw something really ugly.  Here's a peak at how my sketches have been growing and evolving.  (Please excuse the poor quality of these images- I took them with my cell phone)
Here is the first person I drew out.  She looks about the quality that my daughter would draw.  Okay, maybe a little better.  Her people look like scribbles.


I realized I needed to shift the eyes down a bit and work on proportions.  Better, but still kind of goofy looking (and not in a good way).  Here is my second try.


Third time was the charm.  She looks pretty cute at this point.


Now I moved from my little sketch pad and tried to recreate my drawing on my watercolor paper.  This is typically what I create my final pieces on.


Finally, I added in a dragon.  He ended up looking a bit like a pet dragon, so I drew his tongue hanging out and made him look like he's staring at that ice cream cone.


So that's a peak into my process.  The image is still in pencil so I may do a few edits/additions before I add paint and ink. 

What do you guys think?  It's mostly just for fun and to show my daughter, but I do want to do it well.  The one thing that is troubling me now is that in the stories, the dragon is more of a friend than a pet.  But I thought this could be similar to a Mickey/Pluto kind of relationship.  Thoughts?

Friday, August 21, 2015

Sheep Painting

I recently finished a special order for a friend.  She wanted a painting of a sheep with a verse of scripture to hang in her nursery.  This is the finished project.


I'm really happy with it.  I worked long and hard to get it just right.  New moms know exactly what they want so I wanted her to be really pleased.


I struggled with the text and the eyes but am quite happy with how they turned out.  Do you like him?

Tuesday, July 28, 2015

A Present for Nana

I wanted to share a fun little project that my daughter and I made recently as a birthday gift for my mom.

I photographed it on the piano.  Aren't I fancy?

I started by cutting out some hearts from contact paper and added them to a wooden canvas.  I also taped the sides to protect them.  Then I nervously let my daughter cover the piece with acrylic paint.  Sadly I didn't take a picture of the creative process.


I chose a narrow color palette so that if she ended up smearing everything together, it wouldn't turn into brown mush.  Once the paint was dry, I removed the contact paper and tape.

My daughter was thrilled to give it to nana and nana was thrilled to receive it.

Saturday, July 18, 2015

Kids Garden and Playhouse

Today I'm very excited to share our latest project for the kiddos.  We finally finished putting up a little playhouse and garden for the kids in the backyard!


For awhile we had been thinking about adding something fun in the backyard for our kids to play with.  Our son is still too young to do much and our daughter is actually pretty happy just running around and looking for rocks but we wanted something for them to grow into.  After a lot of pinterest research, I decided I really liked the idea of a simple little play-space.


Our daughter loves digging in the dirt and "helping" mommy to plant flowers.  So we gave her her own little play garden.  [Note- I took these pictures after finishing up the garden when the kids were in bed.  It will never look this tidy again.]


The playhouse was a gift from Nana and Papa and my husband used some extra wood we had to build the garden frame.  I love that the playhouse has a cute little play kitchen built into it.


I added two little lavender plants that may or may not survive the kid activity.  I also added a little dump truck and some gardening tools.  And of course the rocks that my dear little girls loves to collect.


I'm really really happy with how this turned out.  It's probably going to result in some very muddy play sessions but I think they will be very joyful muddy play sessions.

Monday, July 6, 2015

Sidewalk Chalk Paint

If you are looking for a quick activity to do with the kiddos, try painting with chalk outside.  If you mix cornstarch, water, and food coloring, it makes a liquid form of sidewalk chalk.  I'm not really the measuring type, so just mix until you find a good consistency.  Then, paint!


Thursday, July 2, 2015

Playroom Inspiration

As the playroom continues to take shape, I wanted to give you a glimpse of my design ideas.  I wanted it to feel like sunshine and the great outdoors.

You've already seen the table and chair set.


Here is a cloud pillow that I got at Ikea.  He's just so fluffy and happy!


Finally here is a little art piece that I found at Michael's.  I love that it ties in creating things for the craft room and then the sunshine of the room's theme.


Hopefully that helps inspire you today!  I'll share more as the room is completed!  I never knew how long a project could take, until I tried to get it done with two little kids around.

Wednesday, June 24, 2015

Peg People Family

My little girl loves to play with little people and dolls.  I wanted to give her a little family set to play with and I have long admired the way that peg dolls look.  I painted this little set.


I was surprised by how hard it was to get some of the details right.  I started with the heads and was glad I did because I had to redo a few of them several times!


Then I added the clothes, starting with basic colors and shapes.


Finally, I added in the little details.  I'm really happy with how they turned out and so is my little pumpkin.  She has been carrying them around and having them do things.


Do you like the house they are in?  It's actually a horse barn but I got it used and it didn't have any horses.  So, dollhouse!  I may add curtains.


Friday, June 19, 2015

Kid's Table Makeover

I am very excited to share this little project today.  We are currently working on creating a playroom/craft-room for our house and this is my first project for it.  A little table and chair set!


This is the before picture.  I found these at a thrift store for only $6.  They are from Ikea and you could buy the same set new for $20, but hey, I love a good deal. :)


I started by giving the table a light sanding and removing all of the stickers.  Then I painted the chairs and table top light blue.

Partway through I realized I should have used a primer because the marker was showing through so I slapped on a coat of primer and then added more blue.  Sometimes that's just how I roll.

To create the scalloped design, I cut up some pieces of painters tape.  Then I added dark blue paint.


Once that was done and the tape was removed, I needed to go back and clean it up a little bit with a small brush.  Finally, I sprayed it with a clear sealer.

I think my little girl is pretty happy with it.  So is giraffe.  And several other animals.  I'm looking forward to many tea parties in our near future.


Tuesday, March 3, 2015

Toddler Room Makeover

When we first moved into our house, I realized it was a great opportunity to re-do my daughter's bedroom.  She was moving from infancy to toddler-hood and I wanted to give her something a bit more bright and fun.  Well, only a year and a half after moving into our house, her room is done.  Tada!


I loved playing around with the contrasting colors of turquoise and hot pink.  My original inspiration came from a shirt she used to wear.  It was turquoise with pink, yellow, and lime green ruffles at the bottom.

Do you like how you can see my shadow in this picture?


One of my favorite areas in the room is this gallery wall.  I looked around for weeks to find enough matching pieces.  I found things at thrift stores, craft stores, and even things we already had.  I also made some original art (see my scripture art how-to here).

Since this picture was taken, I've added a picture of her baby brother :)

Covering up the baby monitor was a bit of a challenge, but my husband helped me hang lanterns up over the crib to help cover it up.  It's a video monitor so we needed to not restrict the line-of-sight. 


What do you think?  I am so pleased with how it turned out. 

Tuesday, August 5, 2014

Art with a Toddler

Hey Friends-

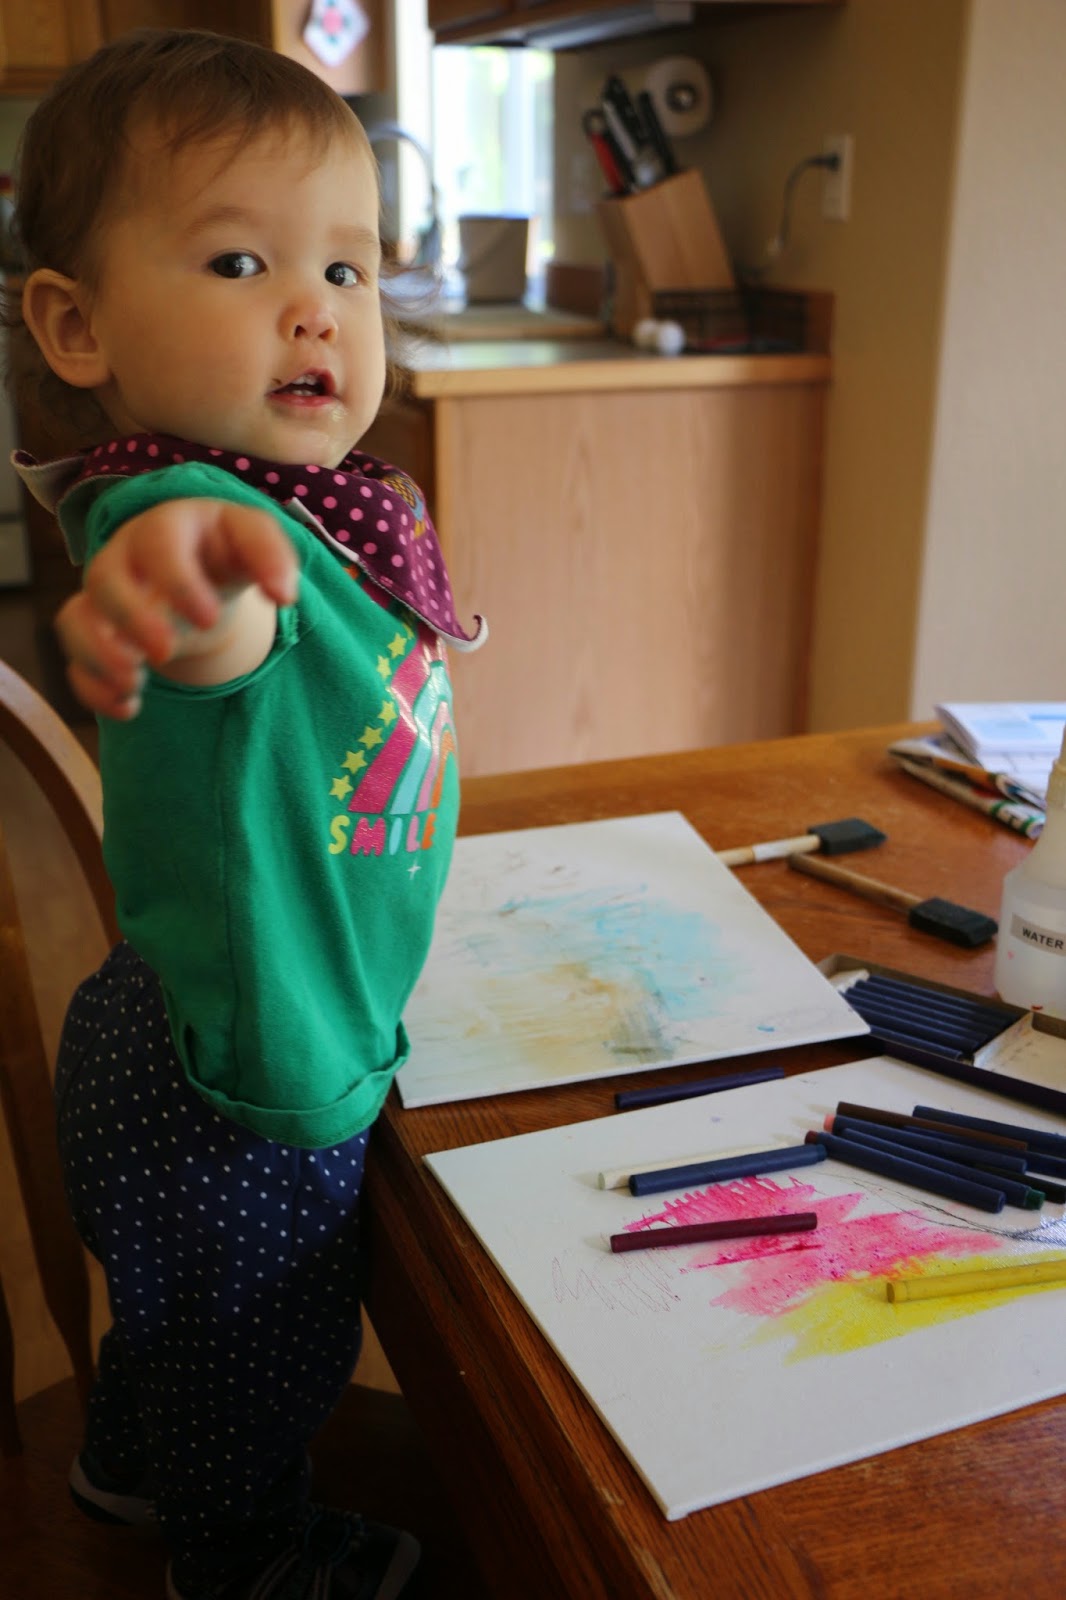
Lately I have been having some fun creating some pieces with my little girl.  She is currently 18-months-old and is definitely just learning how to color.  Crayons were hard for her because she couldn't press down on the paper hard enough to make a mark.  So after a little research, I found these watercolor crayons.  They were much easier because if the paper was wet, the color would instantly appear on the paper even with a light touch.  So we started playing.


It is definitely a challenge to my patience.  Half of our "coloring" time is her picking up all the crayons in one hand and moving them around the table.  But it's fun and I love introducing her to a bit of creative fun, even at this early age.


After seeing a few other artists who have created things with their kids art (see here and here), I decided to try my hand at it as well.  I took our finished watercolors and used ink to fill in an image.  I would typically sit there for 5-10 minutes, just staring, trying to figure out what the colors looked like.  It was fun and challenging.  Here's a few that I made:


I will be showing off these pieces at Avanti Art and Design starting this Friday.  A new show is opening up called "Generations in Art" and it's designed to feature all ages of artists.  If you are in the Seattle area, I'd love for you to stop by!